Gross margin percentage could be the single most important metric a small business owner looks at. Seasoned business executives track it like a hawk by day, week, month, and year.
Your software makes it easy to track, all you need to do is enable the report.
Let’s first learn a little bit about gross margin reporting.
Gross margin comes in two forms: percentage and profit. This is also sometimes simply called your gross profit. This metric shows you how much money you have left over after selling a product or service to cover your general expenses.
Here’s a basic example:
So, if you sell a blue widget for $10, and your inventory cost is $4.00, you have $6.00 in gross profit to cover your operating expenses. Also called your overhead.
$10 in sales
-$4 in cost of goods sold
——
$6.00 In Gross Profit
-$3.00 in Other expenses (rent, utilities etc)
—–
$3.00 in Net Profit
Now, in a primarily service business, your main cost won’t be your inventory cost, it will be your labor cost. E.g. how much you pay a staff member to do a certain job.
Lets say you sell a service for $100, and it takes two hours (2.0) for your employee to provide the service. If you pay your employee $20.00 per hour, your total labor cost is $40.00 and your gross profit is $60.00.
$100.00 in sales
-$40.00 in labor cost
——–
$60.00 in gross profit
As you can see, gross margin is a key indicator to watch in your business. The higher the gross margin percentage, the better.
Want to learn how to use gross margin reporting with your software? Just keep reading!
Gross Margin Reporting
You can set up your gross margin reporting by navigating to “Settings” and then “Software Setup.”
Scroll to the bottom of the page and enable “Profitability Reporting” as shown below.

Next, we need to ensure that the factors influencing gross margin (total cost and total revenue) are set up the way we’d like.
Total cost has two components: labor cost and inventory cost. Inventory cost is simply the cost of your inventory, while labor cost is the product of billable hours and hourly wage paid.
To view billable hours, go to “Settings” then “Software Setup” then “Point of Sale Module” and finally “Services Menu Setup.”
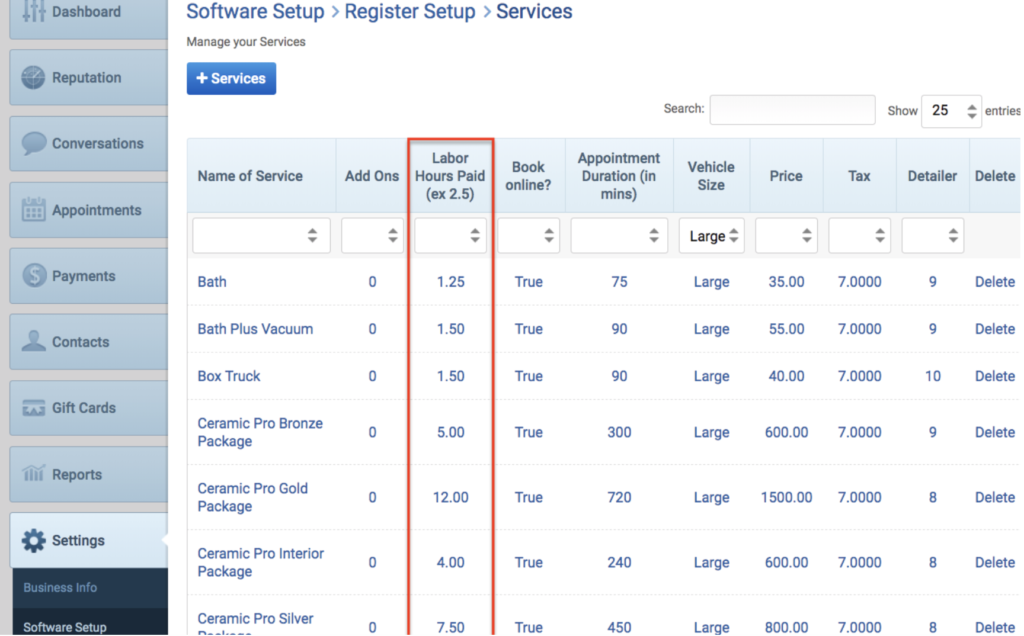
Here you can see labor hours paid, or billable hours. You can enter your estimated time to complete each service (90 minutes = 1.5).
You can also add a service, just call it “Labor,” and set the billable hours to 1 for jobs you are unsure on regarding time.

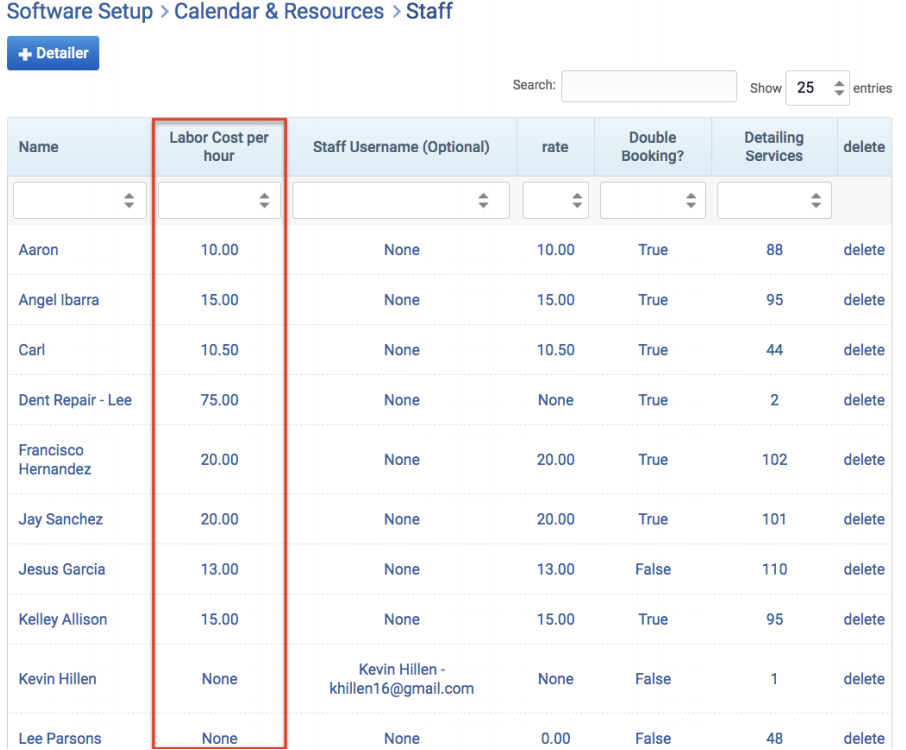
To view and edit hourly wage for employees, go to “Settings” then “Software Setup” then “Calendar & Resources” and finally “Sales Rep” (or whichever title is under Resource Management).
Hourly wage will appear as labor cost per hour, as shown in the following picture.
As always, be sure to use your register to checkout invoices for customers, as this will feed into your total sales.
Now your dashboard page will show you costs and margins by day, week, or month.

Additional Notes on Inventory Cost and Labor Cost
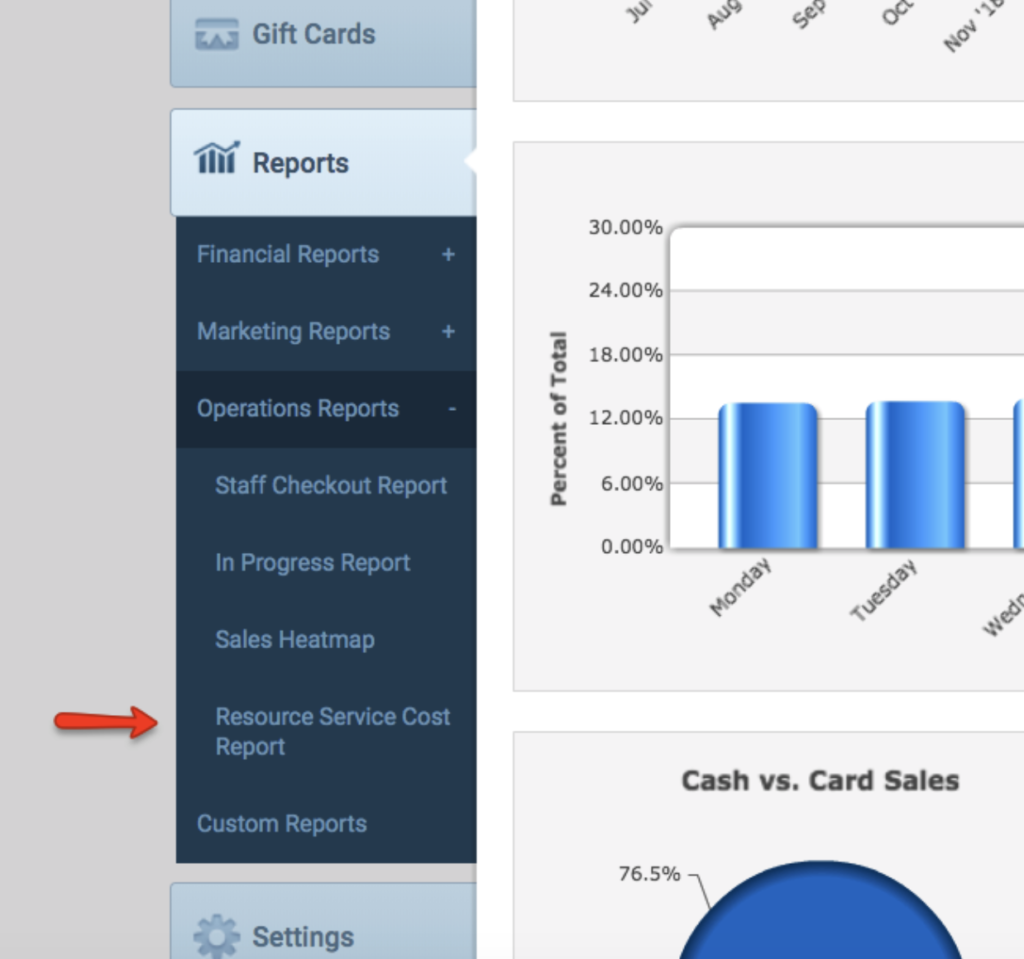
Remember, you can always view your labor costs by selecting your “Resource Service Cost Report.”
To read our full article breaking down labor costs, click here.
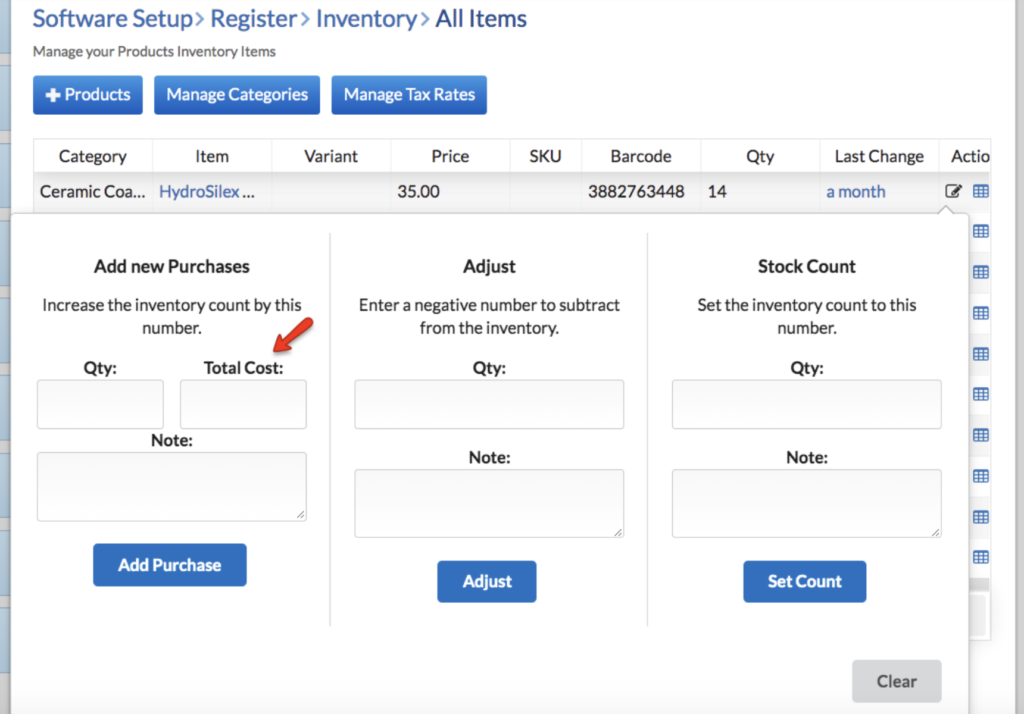
If you sell any inventory or parts, enter the cost in the outlined category below (we use last cost for inventory accounting).
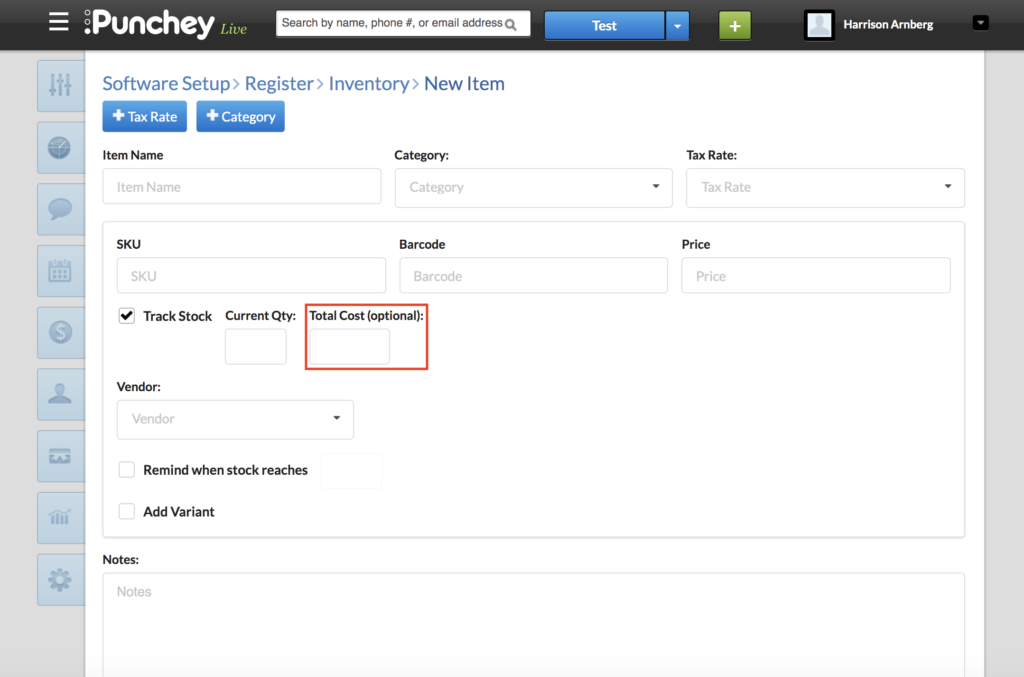
Or here:
When you sell a product from inventory, we use the last cost entered to compute the inventory cost for that invoice.
Want to learn more? Check out our YouTube Channel for helpful content and read more of our how-to guides!