If you have specific grandfathered-in customers that you would like to discount, we recommend generating the bill after booking the appointment and applying your discount then. When you are ready to checkout, just click on that invoice and the discount will be there.
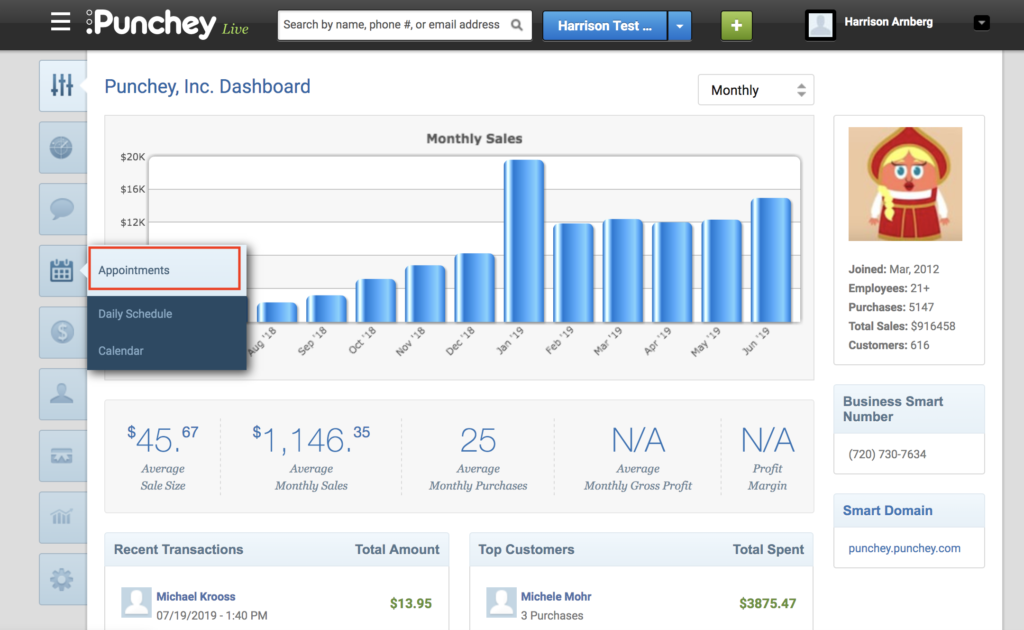
First, navigate to “Appointments” from your dashboard screen.
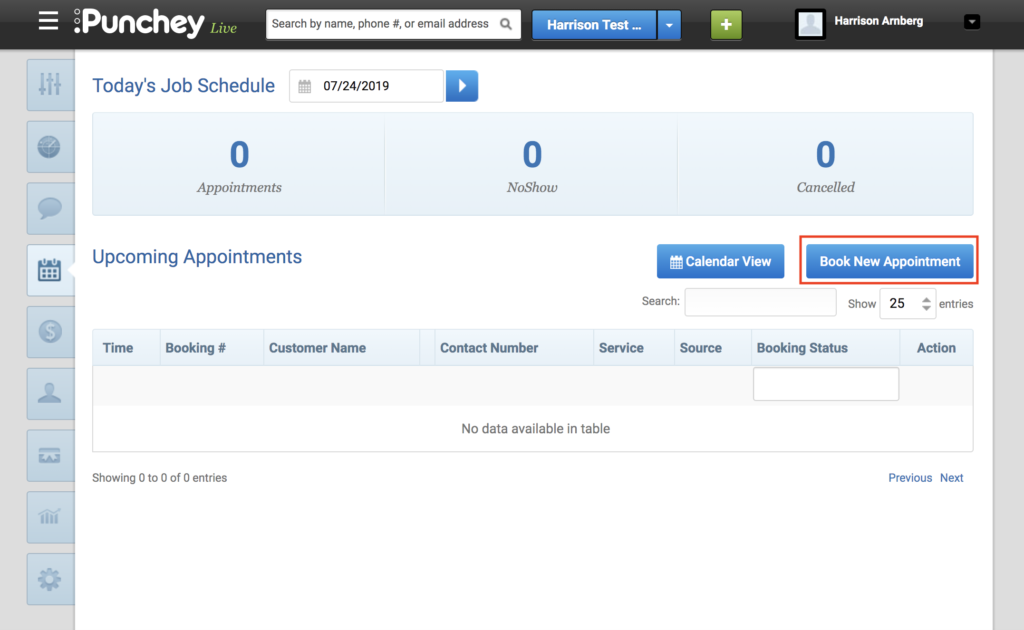
You can then either edit an existing appointment or book a new one. To book a new appointment, click the outlined blue button below.
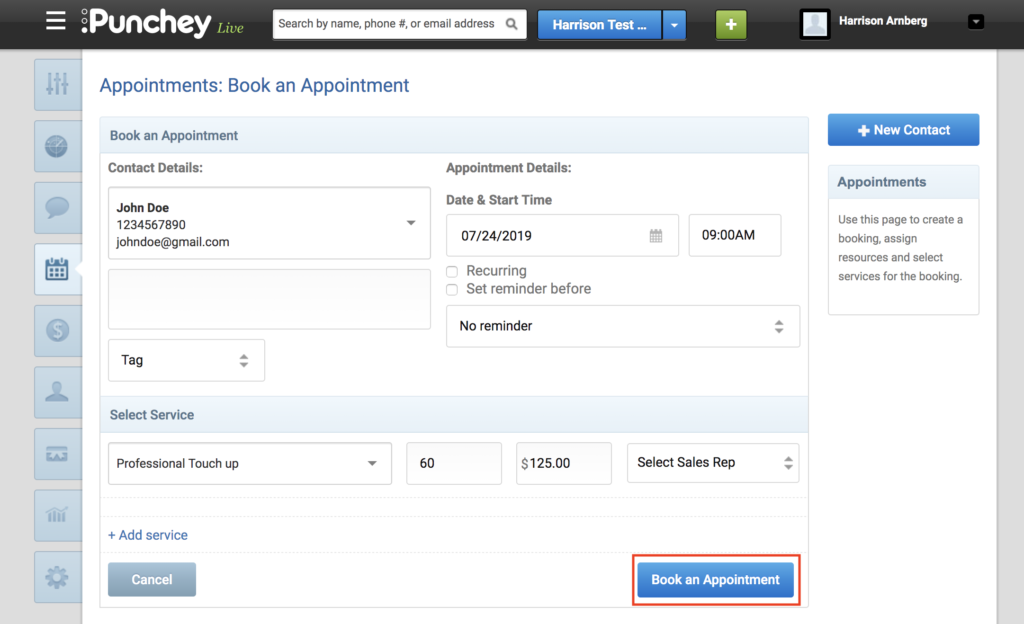
Next, enter the details of your appointment and book it.
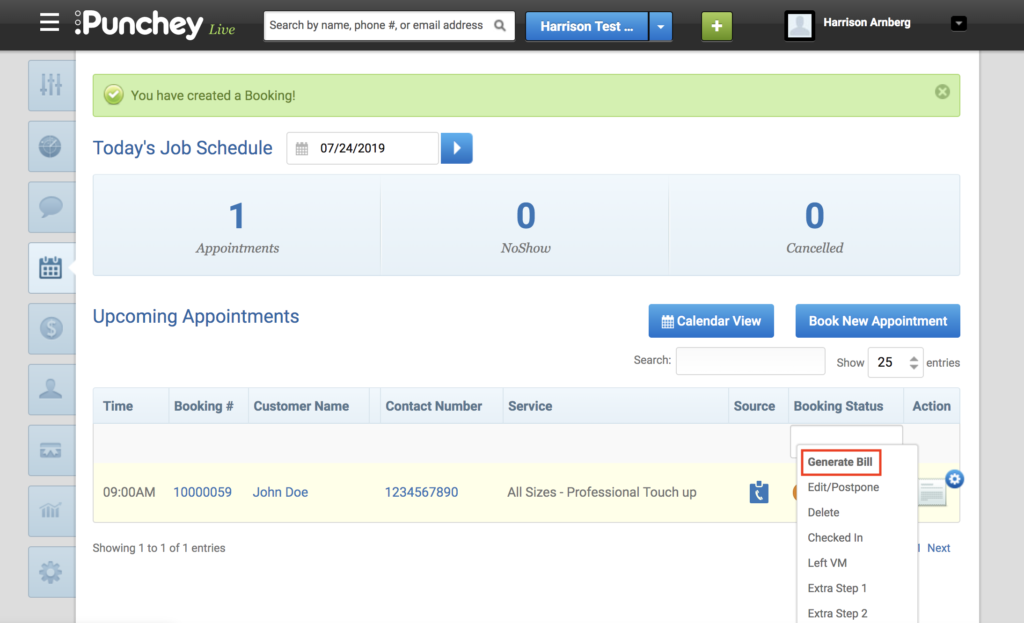
After your appointment is booked, you can return to the appointments page. Hover over the icon under “Action” and then select “Generate Bill.”
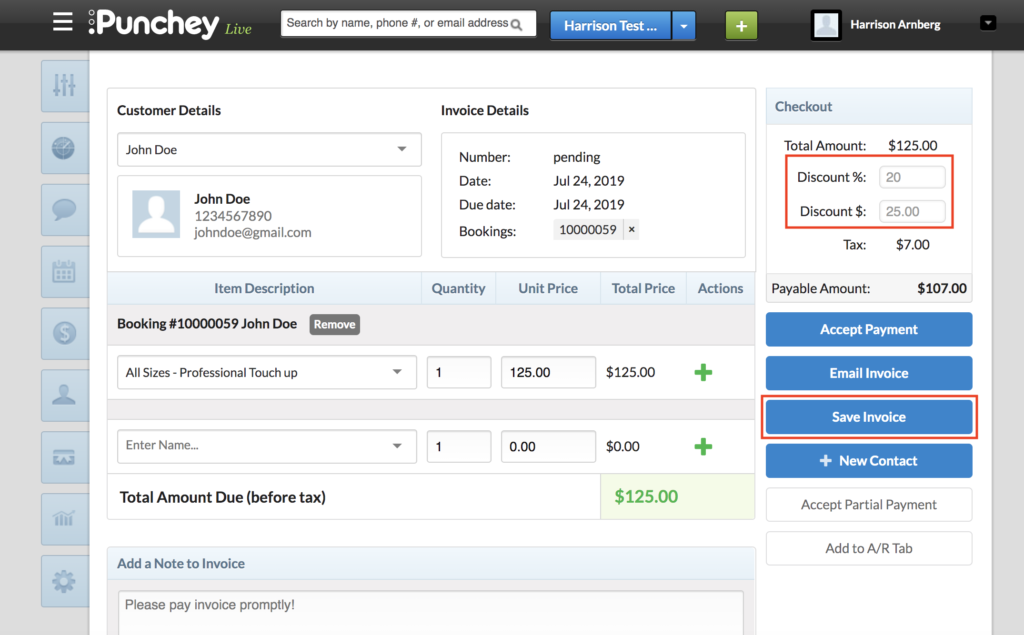
You’ll then be brought to the invoice screen where you can enter a discount for your special customer and save the invoice. Now you will be ready to go for your appointment.
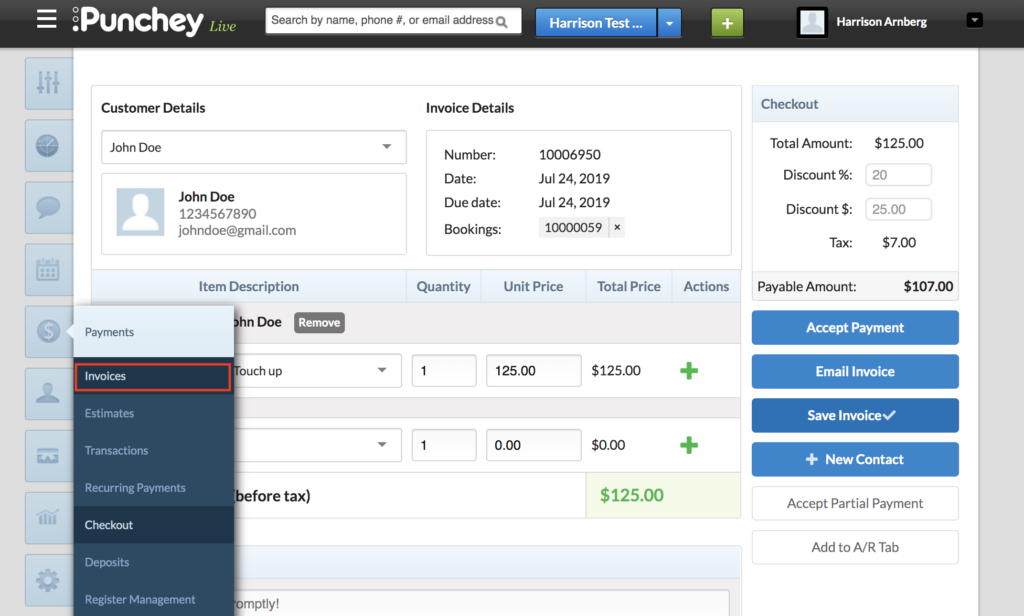
After you have completed your service and are ready to check out your customer, navigate to “Invoices” under “Payments.”
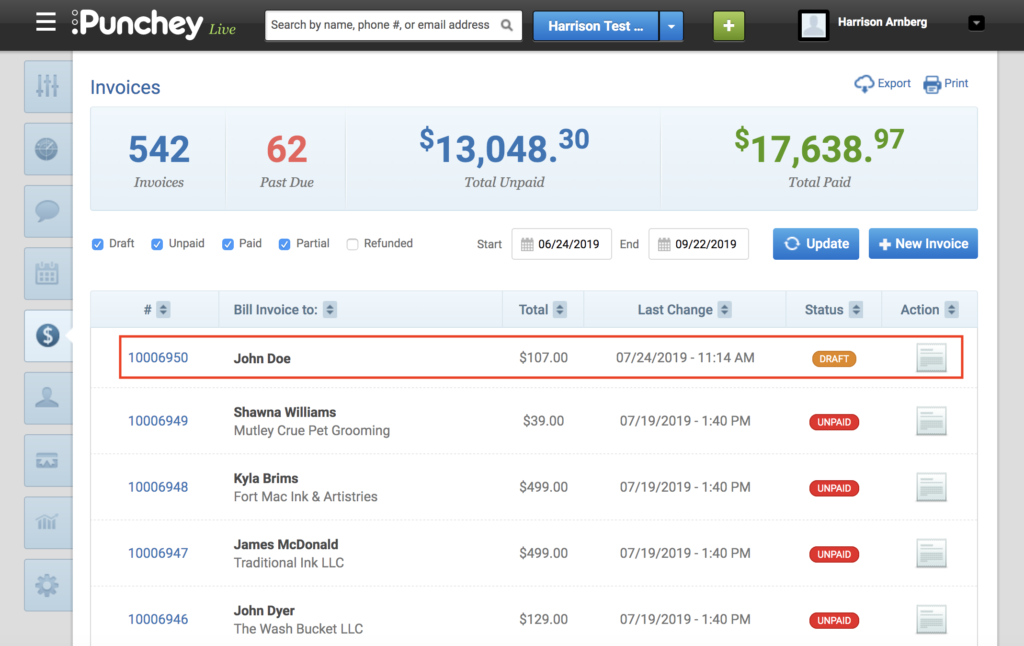
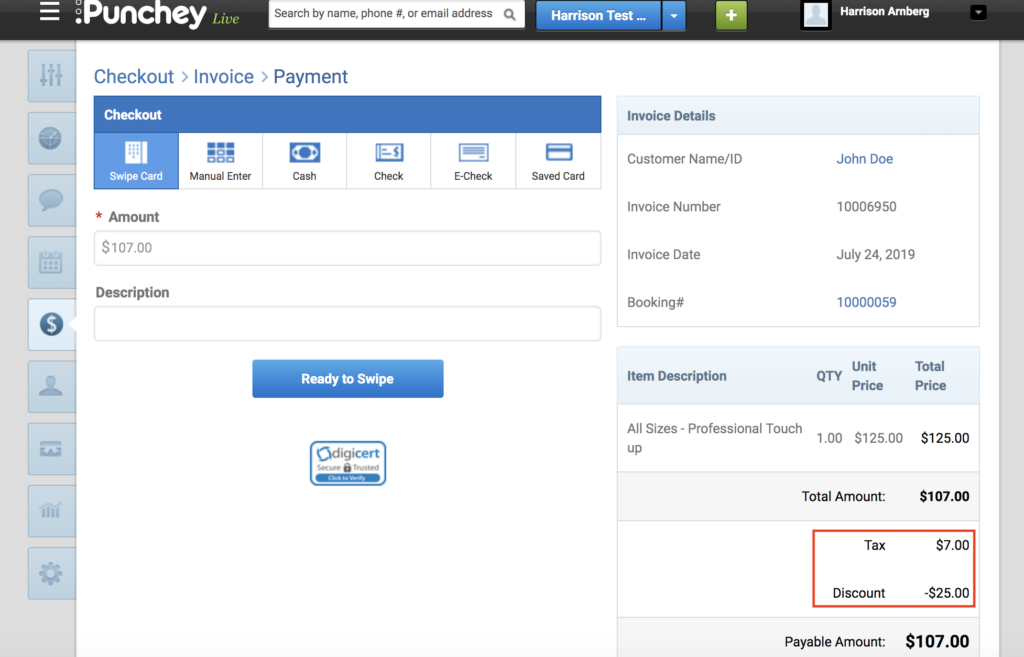
Next, your invoice will appear and you can begin the process of checking out.
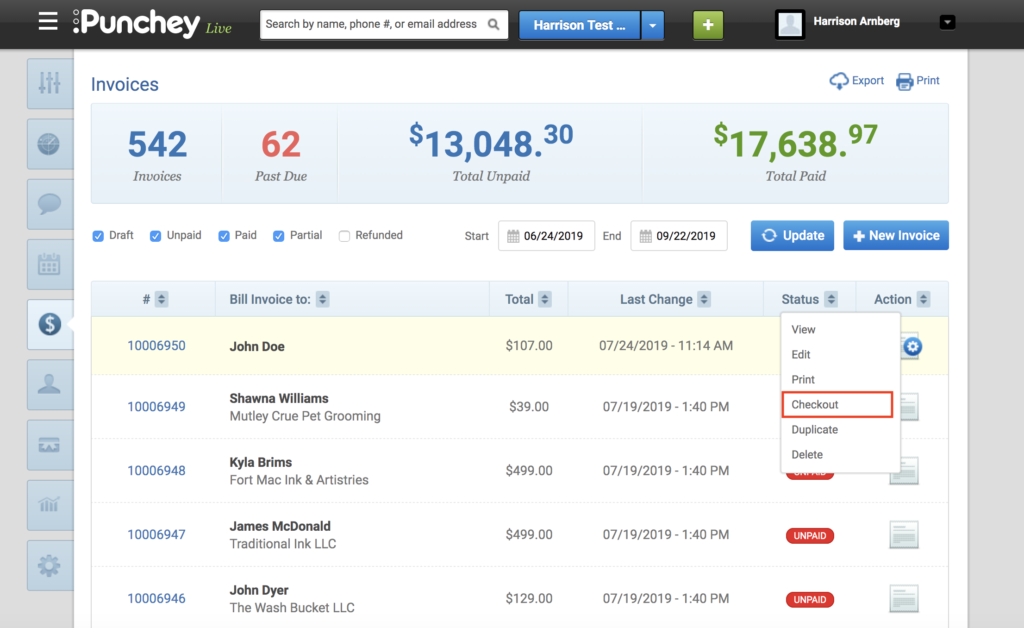
Hover over the logo under “Action” once again and click “Checkout.”
Now, simply accept payment and you are all set!
Want to learn more? Check out our YouTube Channel for helpful content and read more of our how-to guides!